Download Foldda Integrator if you haven’t already done so. Unzip the download and take a look at the content –
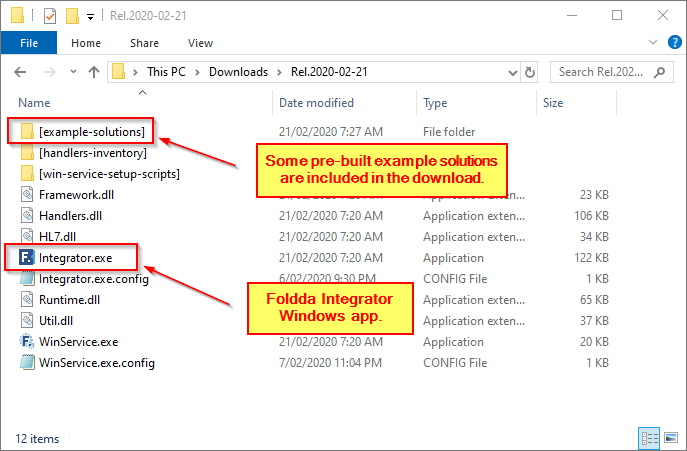
Note that in the “example-solutions” sub-folder, there are some sample data provided for testing out the included example solutions –

In this demo-exercise, we are going to test run the “01_HL7_Sender_n_receiver” example, and we’ll use the “C:\Temp” folder for placing the input data files, create this folder if it doesn’t already exist.
There is no installation required for using the program, just double-click the “Integrator.exe” and launch the Integrator directly –

Click OK to dismiss the warning dialogue below. It warns you the Integrator is in DEMO mode, which is fine for this exercise.

A Foldda solution is a data-processing program. Physically, it is a Windows folder that contains some special files and sub-folders. For running a Foldda solution, we need to tell the runtime where the solution resides – this is called “loading a solution”.
From the “example-solutions” folder, drag the first example solution (folder) and drop it onto the Integrator windows, like this –

Logically, a solution consists of one or many data processing pipelines, called data-flows. In the Integrator UI, a data-flow is shown as a tree structure consisting of a collection of nodes, with each node represents a step in the sequential data-flow processing.
As in the picture below, the example solution has two separate data-flows: one is an “HL7 network sender” and the other is an “HL7 network receiver” –

In the Sender data-flow, the top “HL7FileReader” node does what its name suggests – reading HL7 files from a source folder, plus HL7 record-parsing; the second node, “HL7NetSender”, represent the second step of the data-flow: it takes in the HL7 records produced from the first node and sends these records to a pre-configured network destination.
The Receiver data-flow also consists of two nodes: the first is a “receiver” that listens to a network port on this computer for incoming HL7 network data; the second node, the “catcher”, simply captures and stores what is received from the receiver.
As you may be thinking, we can use the solution’s receiver data-flow to test out its sender data-flow, and that’s what we’re going to do.
Node Settings
As each node is for performing a specific data-processing task in a data-flow, it has a set of settings that is specific to the task. When clicking on a node, notice the changes in the “Parameters” section in the right-hand “node details” panel. These are the settings of the selected node. For instance, for the “HL7 File Reader” node, the settings specify the “source folder” and the input files’ naming pattern.

Take a look at each node’s settings. In this exercise, we’ll use these pre-configured setting values, but if required, these settings can be changed to suit your setup and environment.
Right-click any node of the sender data-flow and select “Start branch”, notice the color dot of a node turns from red to green, indicating the node is now started. Start the receiver data-flow in the same way.

If Windows firewall asks for “network listening” permission for starting the HL7NetReceiver node, answer “Allow access” to grant the permission.

Now we have both the data-processing flows started, we are ready to see the solution in action.
As explained earlier, the HL7 File-reader node is configured to read source files from folder “C:\Temp”, and as it’s configured, the source file’s name needs to have a “*.hl7” file-extension.
To meet this configuration requirement, use the sample HL7 file provided in the “Sample_Data” folder, and copy it to the “C:\Temp” source folder. Observe the data being processed by the two data flows, and each node changing counter numbers while it’s processing the data. These counters show how many input and output records, and data containers that are processed by each node.

(If you’ve just created the “C:\Temp” folder after loading the solution, or you’ve changed the settings of the file-reader node, you’ll need to restart the file-reader node for it to pick up the change.)
And that’s the end of our demo. No installation, just drag-n-drop and a few clicks – easy, isn’t it?